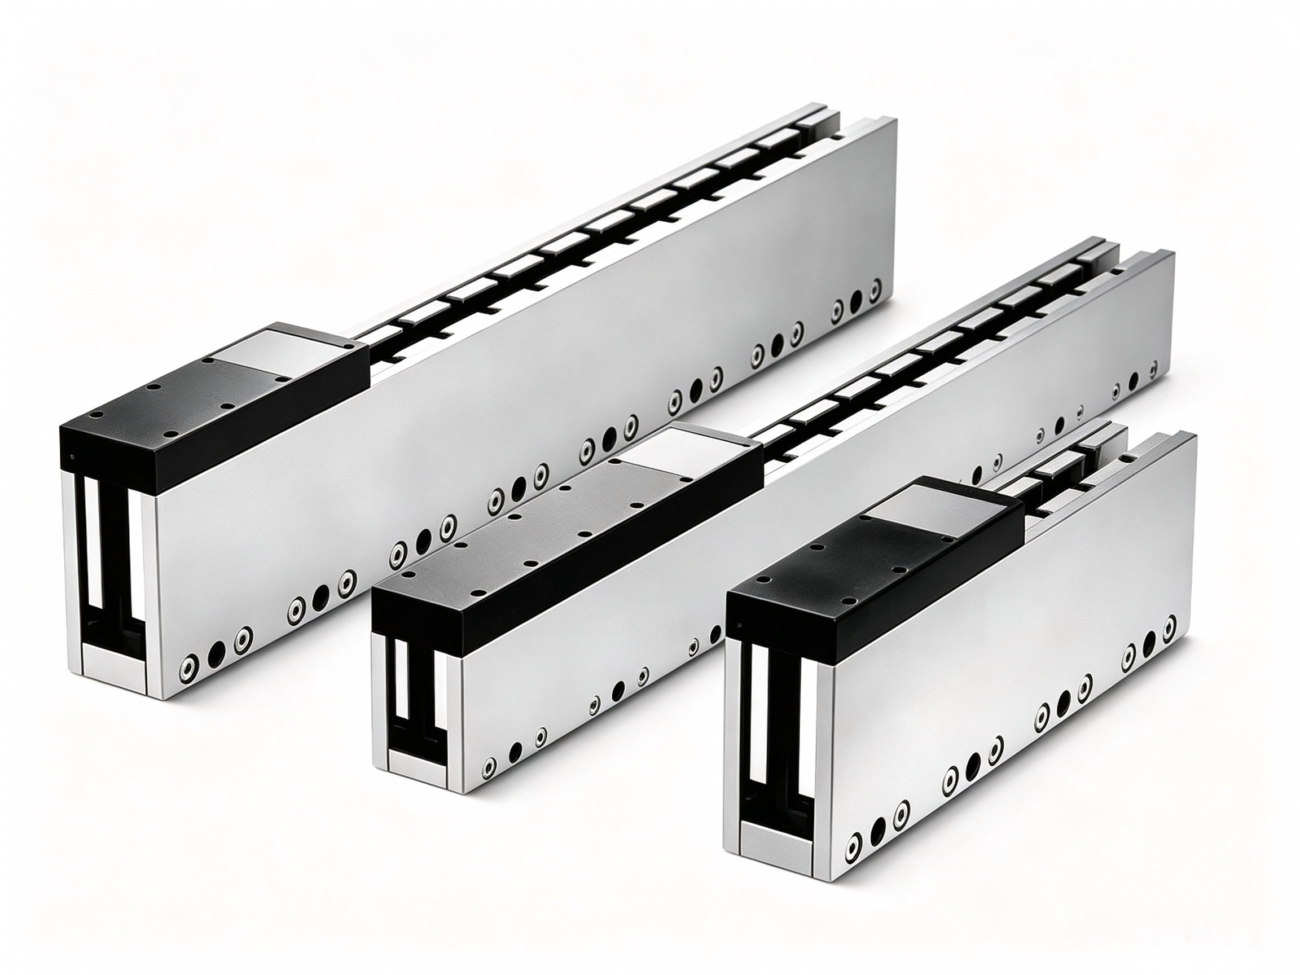
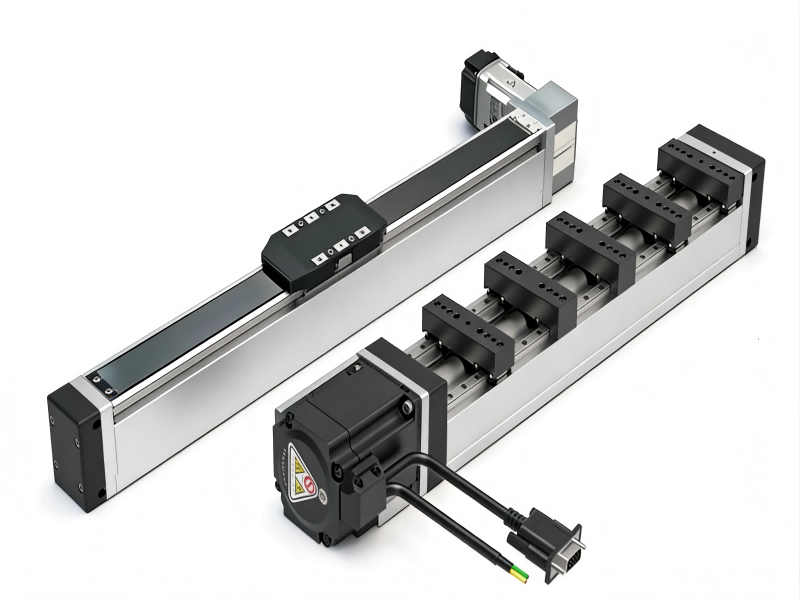
Linear actuators sit at the heart of countless automated systems. From pick-and-place robots on assembly lines to the positioning stages inside CNC machines, these devices convert rotary motion into precise linear movement thousands of times per day. When they work, nobody notices them. When they don’t, production stops.
The challenge is that linear actuators rarely fail without warning; they almost always give off signals first. These symptoms can include a slight hesitation on start-up, a new hum that wasn’t there last week, or a drift in positioning accuracy that has crept in over the past 200 cycles. The problem is that maintenance teams don’t always know what to listen for. This article covers the symptoms, tests, and decision criteria you need to identify a failing actuator before it causes a problem.
Common symptoms of a failing linear actuator
The most common early warning signs are unusual noise, slower travel speed, inconsistent positioning, visible wear on the rail or screw, and motor overheating. Each of these tells a different story about what might be going wrong inside the unit.
Unusual noise patterns
A healthy linear actuator running under normal load produces a steady, predictable sound. Changes in that sound almost always mean something has shifted mechanically.
A grinding or gritty noise typically points to contamination inside the ball nut or bearing tracks. Dust, metal shavings, or degraded grease create abrasive friction that damages the rolling elements over time. In cleanroom or semiconductor environments where linear module contamination standards are strict, even minor seal damage can let particles in.
A rhythmic clicking that syncs with the lead screw’s rotation often means a damaged ball return circuit. One or more balls may have chipped or deformed, creating a skip point in the recirculation path. This is more common in heavy-load applications where impact forces exceed the rated dynamic load of the linear module system.
Squealing or chirping usually comes from insufficient lubrication on the guide rails or bearings. This is the easiest problem to fix but the most frequently overlooked; teams run actuators dry for weeks before investigating the noise.
Speed and positioning drift
When a linear actuator loses its ability to hit the same position consistently, the root cause falls into two categories: mechanical backlash or encoder failure.
Mechanical backlash develops when clearance grows between the screw and nut, or between the coupling and motor shaft. In a ball screw stage designed for ±0.01 mm repeatability, backlash of even 0.05 mm will show up as visible positioning errors in your process. Over time, what started as a tight linear model with predictable motion becomes a sloppy mechanism that overshoots and undershoots.
For applications that depend on tight positioning, such as the stages used in ball screw linear stages for robotics and CNC, a drop in repeatability is the single clearest sign that maintenance is overdue. Measuring this parameter doesn’t require specialized equipment. A dial indicator mounted to the carriage and zeroed at a reference point will reveal drift after just a few back-and-forth cycles.
Motor overheating
Thermal problems in the motor often get blamed on the motor itself when the real culprit lives deeper in the drivetrain. A failing bearing, a dry ball nut, or a bent guide rail creates excess mechanical resistance that forces the motor to draw more current. More current means more heat. The motor isn’t the problem; it’s the messenger.
A good rule of thumb: if the motor case temperature consistently exceeds 80°C under normal duty cycles, something downstream is making it work too hard. This is especially worth watching in belt-driven designs where a loose or overtensioned belt can silently overload the motor for months before bearings fail completely.
Electrical diagnostics for linear actuators
Resistance testing across motor windings, insulation checks between phases and ground, and back-EMF measurements under manual rotation can isolate electrical faults with nothing more than a multimeter. More advanced issues like partial winding shorts or encoder signal dropout require an oscilloscope, but the basic checks catch the majority of field failures.
Winding resistance and insulation tests
Stepper motors and servo motors inside linear actuators typically have phase-to-phase resistance values between 0.5 and 10 ohms, depending on frame size and winding configuration. When you measure between phases, A to A-, B to B-, or U to V and V to W for three-phase servos, the readings should match within 5% of each other.
A difference larger than 10% between phases usually means a partial short has developed in one winding. Partial shorts don’t always trip the drive’s overcurrent protection right away. They cause subtle torque ripple that shows up as uneven motion, especially at low speeds. Over the next few hundred operating hours, the short propagates until the drive finally faults out.
Insulation resistance between any motor phase and the frame should exceed 20 megohms when measured at 500 VDC with a megger. Values below 5 megohms mean moisture or conductive debris has compromised the winding insulation, and the motor is on borrowed time. This is particularly relevant for linear actuators operating in humid environments or washdown areas where IP ratings get pushed to their limits.
Encoder and feedback signal health
Incremental encoders output A, B, and Z channels as square-wave signals. A healthy encoder produces clean rising and falling edges with consistent duty cycles. When the signal starts degrading, amplitude drops, edges round off, or noise creeps onto the line, the drive loses position counts intermittently. The result is a positioning error that looks random and is nearly impossible to troubleshoot without an oscilloscope.
Absolute encoders can fail more subtly. A single-bit error in the position word, caused by a dirty optical disc or a failing photodetector, might shift the reported position by a few microns. The drive compensates, and the error accumulates cycle after cycle. By the time someone notices, the linear actuator may have been producing out-of-spec parts for an entire shift.
Load monitoring with drive parameters
Most modern servo drives log torque or current demand continuously. Plotting torque demand over time reveals trends that a visual inspection cannot. A gradual upward trend in baseline torque demand, say, from 30% to 45% of rated torque over six months of identical duty cycles, tells you that mechanical resistance inside the actuator is increasing. This is where a good linear regression model applied to historical torque data can forecast the remaining useful life of the actuator with surprising accuracy. The math isn’t complicated: torque goes up linearly with friction, and friction increases linearly with wear in most ball-screw and belt-driven systems.
If you’re sourcing replacements and need to navigate import documentation, be aware that the linear module HS code varies by type. Ball screw actuators, belt-driven modules, and linear motor stages fall under different harmonized system classifications depending on stroke length, drive type, and whether they ship with integrated motors.
Mechanical inspection and wear assessment
Physical inspection of guide rails, ball screws, belts, bearings, and seals reveals wear patterns that no electrical test can detect and often gives you the earliest warning of developing problems. A 15-minute visual and tactile check during scheduled downtime catches problems weeks before they become emergencies.
Ball screw and nut wear
The ball screw is the most expensive wear component in a screw-driven actuator and also the one most likely to fail first if lubrication isn’t maintained. Wear shows up as pitting or spalling on the ball tracks. Run your fingertip along the screw groove; any roughness or irregular texture means the surface has started to degrade. Under magnification, pitting looks like tiny craters where the hardened case layer has fractured under repeated contact stress.
Ball nut backlash can be measured directly. Lock the carriage in place and apply a reversing torque to the screw while measuring carriage displacement with a dial indicator. For precision stages, backlash beyond 0.02 mm is enough to affect process quality in high-tolerance applications. Some linear module manufacturers design their ball nuts with adjustable preload so users can take up clearance as it develops, but this only works up to a point; once the ball tracks are visibly pitted, adjusting preload masks the symptom and accelerates failure.
Guide rail and bearing block inspection
Linear guide rails take the brunt of side loads and moment loads that the screw was never designed to handle. Misalignment between the rail and the mounting surface creates concentrated loading at the bearing block ends. Over time, this produces a visible wear pattern: the rail surface near the stroke ends looks polished or scored, while the middle section remains relatively untouched.
Check bearing block seals for cracks or deformation. Once a seal fails, contamination enters the ball tracks within hours. The bearing blocks will start making a clicking sound on direction reversal, the classic sign that debris has gotten past the seals and is crushing between the balls and raceways.
For applications that demand clean operation, the type of sealing matters. Actuators designed for semiconductor or medical equipment, such as the dust-free ball screw linear stages, use multi-lip seals and positive-pressure purge ports to keep particles out. If these seals are damaged or the purge air supply drops, contamination is guaranteed.
Belt condition in belt-driven actuators
Belt-driven actuators wear differently from screw-driven ones. The belt itself is a consumable with a finite life; steel-reinforced polyurethane belts in industrial duty typically last 12,000 to 20,000 operating hours depending on load, speed, and pulley diameter.
Inspect belts for:
Cracks developing at the tooth root, especially near the belt edges
Missing or deformed teeth, which cause positioning errors during rapid direction changes
Steel cord exposure on the belt sides, indicating edge wear from pulley flange contact
Belt dust accumulation around the drive pulley, a sign of accelerated wear from misalignment
Belt tension is equally important. An undertensioned belt skips teeth under acceleration, causing sudden and unpredictable positioning errors. An overtensioned belt overloads the motor bearings and the driven pulley shaft, shortening the life of components on both ends. Most belt-driven linear stages ship with a recommended tension value. A tension meter should be part of every maintenance toolkit.
Noise and vibration analysis in linear actuator diagnostics
Vibration spectrum analysis identifies specific fault frequencies that correspond to ball pass rates, screw rotation speeds, and bearing defect frequencies, turning acoustic data into a precise diagnostic tool. What sounds like “a bad bearing” to the human ear is, under frequency analysis, a clear signature telling you exactly which bearing and which race is damaged.
Using vibration sensors for fault isolation
Mounting an accelerometer on the linear actuator housing near the bearing supports captures the mechanical energy transmitted through the structure. The key frequencies to watch:
Ball pass frequency outer race (BPFO): Peaks at this frequency indicate damage to the outer race of a support bearing. The exact frequency depends on the bearing geometry and shaft speed, but it typically falls between 3 and 8 times the rotation frequency.
Ball pass frequency inner race (BPFI): Inner race damage produces sidebands around the BPFI at shaft rotation frequency. These sidebands differentiate inner race damage from outer race damage without disassembly.
Ball screw pass frequency: The rate at which balls circulate through the nut, equal to the screw RPM multiplied by the number of balls in the active circuit. A spike here points to ball joint wear.
Portable vibration analyzers that cost under $2,000 can collect this data and auto-identify fault frequencies. For facilities running dozens of linear actuators, setting up a quarterly vibration monitoring schedule pays for itself many times over in avoided unplanned downtime.
Interpreting noise changes without specialized equipment
Not every facility has vibration analysis equipment. A mechanic’s stethoscope, or even a long screwdriver pressed against the housing with the handle against your ear, can localize noise sources with surprising precision. Move the probe point along the linear actuator housing while it runs through a full stroke. The loudest point is rarely the fault location; it’s where the housing happens to resonate at that frequency. But comparing the left bearing housing to the right bearing housing quickly reveals which end has the problem.
Changes in the noise character also carry meaning. A smooth hiss becoming a rough rattle suggests that bearing preload has relaxed. A whine that increases in pitch with speed indicates a lubrication film that’s breaking down under shear. These changes happen gradually over weeks or months, which is why maintenance logs that include subjective noise notes (“sounds fine,” “slight rattle at left end,” “louder than unit #3”) are more valuable than they look.
When to repair versus replace a linear actuator
Replace the linear actuator when the ball screw or guide rail shows visible pitting, when repair costs exceed 50-60% of a new unit, or when downtime tolerance is zero and a spare can be swapped in immediately. Repair makes sense for minor issues like seal replacement, belt changes, or bearing swaps on otherwise healthy units.
Decision framework
This table summarizes the repair-versus-replace logic for the most common failure modes:
Failure mode
Repair approach
Typical cost vs. new
Recommended action
Worn belt (belt-driven)
Replace the belt and re-tension it.
10-15%
Repair
Failed bearing block
Replace bearing block and inspect the rail.
20-30%
Repair
Contaminated ballpoint
Flush and re-lubricate if caught early
5-10%
Repair
Pitted ball screw tracks
Replace ball screw + nut assembly
40-55%
Evaluate based on age
Pitted guide rail + failed bearings
Replace rail + bearing blocks
55-70%
Replace
Motor winding short
Replace motor only
30-40%
Repair if actuator body is healthy
Bent actuator housing
Full replacement
80-100%
Replace
The 50-60% threshold isn’t arbitrary. Below that line, a repair extends the asset’s life by anywhere from 6 months to several years. Above that line, the repaired unit carries residual risk from whatever caused the original failure, misalignment, overloading, or contamination that might have affected multiple components simultaneously.
When lead time makes the decision for you
Sometimes the decision comes down to logistics, not economics. If your facility runs linear actuators from specialized linear module manufacturers with 8-12 week lead times, keeping a spare on the shelf changes the math entirely. With a spare available, you pull the failed unit, drop in the replacement, and restore production in under an hour. The failed unit can then be torn down, inspected, and repaired without time pressure.
Without a spare, a single failed actuator can idle an entire production line for weeks. In that scenario, even a marginal repair that buys you enough uptime until the replacement arrives is the right call. The repair doesn’t have to be perfect; it just has to last long enough.
For high-performance applications where positioning precision is critical, laboratory automation, optical inspection, semiconductor handling, electric cylinder actuators, and direct-drive linear motor stages provide greater reliability and longer service intervals than traditional screw-driven designs. The upfront cost is higher, but the total cost of ownership over 5-7 years often comes out lower when you factor in reduced maintenance labor, fewer replacement parts, and less production downtime.
Preventive maintenance for longer actuator life
A disciplined lubrication schedule, regular backlash measurement, belt tension checks, and monthly visual inspections prevent most failures, and the ones that still happen will be caught early enough to schedule repairs around production. The most expensive maintenance is the maintenance you didn’t do.
Lubrication: the cheapest insurance
Grease inside a ball nut or linear guide has three jobs: separate metal surfaces from each other, carry heat away from the contact zone, and trap contaminants before they reach the rolling elements. It does all three jobs until it doesn’t, and the transition from “working” to “not working” happens fast once the grease breaks down.
Lithium-based greases with EP additives handle most industrial linear actuator applications. The relubrication interval depends on stroke length, speed, load, and environment. A general starting point: relubricate every 500 operating hours or every 3 months, whichever comes first. Halve that interval for actuators running at more than 80% of rated load or in environments above 50°C.
Overgreasing is a real problem. Forcing too much grease into a ball nut pushes it past the seals and into the screw chamber, where it attracts dust and turns into an abrasive paste. Most manufacturers publish a grease volume specification for each nut size. Use it.
Building a maintenance checklist
A practical monthly checklist for each linear actuator in your facility:
Measure and log backlash at the carriage. Compare to the baseline from installation.
Listen for changes in operating noise across the full stroke.
Inspect seals for cracks, tears, or deformation.
Check belt tension with a tension meter (belt-driven units).
Verify that all mounting bolts are at specified torque.
Log the drive’s torque/current demand at a standard test speed and load.
Inspect cable carriers and flex cables for fatigue cracks near the bend radius.
This takes about 10 minutes per actuator and creates a paper trail that makes failure prediction much more accurate over time. When the maintenance log shows backlash trending from 0.01 mm to 0.03 mm to 0.06 mm over six months, you don’t need a vibration analyzer to know that a ball screw replacement is coming.
Putting it all together
Diagnosing a bad linear actuator doesn’t require a lab full of expensive equipment. A multimeter, a dial indicator, a stethoscope, and a disciplined maintenance log cover 90% of what you need. The trick isn’t finding the tools; it’s knowing which symptom points to which failure mode and acting before the problem cascades.
Pay attention to the sounds your linear actuators make. Log the numbers. Check the grease. When something changes, figure out why. Most actuator failures give weeks of warning. The difference between a $200 bearing swap and a $4,000 replacement plus three days of lost production usually comes down to whether someone was listening.
FAQ
Can a linear actuator fail intermittently?
Yes, and intermittent failures are often the most frustrating to diagnose. Loose connectors, cracked solder joints on encoder boards, or damaged flex cables inside the cable carrier can cause position errors that come and go depending on temperature, vibration, or the carriage position along the stroke. If the problem disappears after the linear actuator cools down and reappears after it warms up under load, prioritize electrical connections and encoder signal integrity in your diagnosis.
How long should an industrial linear actuator last before needing major service?
In continuous-duty industrial applications, a well-maintained ball screw actuator typically reaches 15,000 to 25,000 operating hours before the ball screw or guide rails need replacement. Belt-driven actuators run 12,000 to 20,000 hours before belt replacement, with bearing blocks lasting through 2-3 belt changes. Direct-drive linear motor stages push service intervals well past 30,000 hours because there is no mechanical transmission element to wear. These are averages; actual life depends heavily on load profile, duty cycle, environment, and lubrication discipline.
What is the difference between diagnosing a stepper-driven actuator and a servo-driven actuator?
Stepper-driven actuators add a failure mode that servo systems don’t have: missed steps. If the stepper motor stalls momentarily during acceleration, the drive has no way to know; it just keeps counting pulses as if the move completed successfully. This produces a position error that persists until the next homing cycle. Servo systems close the position loop with encoder feedback, so they detect and correct positioning errors in real time. Diagnostically, this means a servo actuator will fault out when something goes wrong, while a stepper actuator may silently produce bad parts. For stepper systems, check positioning accuracy regularly with an external reference rather than trusting the step count.
HCY Automation delivers integrated solutions across motion control, linear motion, robotics, machine vision, pneumatic systems, and precision gearboxes to help global manufacturers build smarter, faster, and more reliable production lines. Our engineering team helps you select and integrate the right motion control, robotics, and automation components for your specific application.